
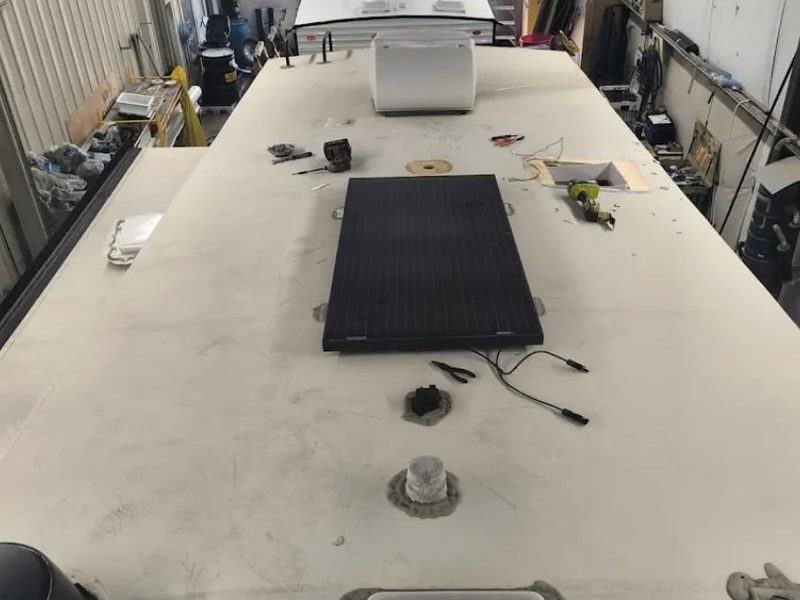
An RV roof leak rarely announces itself. It seeps in quietly at a seam or a vent, tracks along the ceiling framing, and by the time you spot a soft spot or a brown stain, water has often been working on the wood and insulation for weeks. For owners who keep a travel trailer, fifth wheel, or motorhome parked through the wet Middle Tennessee spring and the humid summers around White House, Robertson County, and the 37188 area, catching a roof leak early is the difference between a tube of sealant and a torn-off, rebuilt roof. This guide covers where RV roof leaks actually start, the warning signs inside the coach, how to inspect your roof safely, and what your repair options really cost.
Where RV Roof Leaks Actually Start
The big flat expanse of your EPDM or TPO roof membrane is usually not the problem — it is the dozens of places where something pokes through it. Every one of those penetrations is sealed with a bead of lap sealant that dries out, cracks, and pulls away under UV and temperature swings. The usual suspects are the air conditioner mounting gasket, the plumbing vent covers, the roof vents and fans, the skylight over the shower, the refrigerator roof vent, the TV antenna base, and the long seams where the roof meets the front and rear caps.
Those front and rear cap seams take the worst of it because highway wind and rain drive straight at them, and I-65 north of Nashville is a hard-mile corridor for any RV that travels it. When the sealant along a cap seam checks and lifts, water rides the airflow right into the seam. That is why a good inspection walks every edge and every fitting, not just the middle of the roof.
Signs You Already Have a Roof Leak
Because the entry point and the place water shows up are often far apart, the interior clues matter. Watch for a ceiling or upper-wall stain that spreads or darkens, a soft or spongy feel when you press the ceiling panel or walk the roof, a musty smell inside a closed-up rig, wallpaper or paneling that is delaminating or bubbling, and window or slide trim that stays damp. On the roof itself, look for sealant that has cracked into little islands, peeled at the edges, or turned chalky, and for any low spot that ponds water after rain.
If the roof decking flexes underfoot or a ceiling panel sags, water has already reached the wood substrate. At that stage a surface reseal will not save it — the wet decking has to be opened up and replaced. The sooner you catch it, the smaller and cheaper that job stays.
Why RV Roof Seals Fail Faster Than Owners Expect
Lap sealant looks tough, but it lives a hard life. Relentless UV bakes the top layer brittle, and the daily swing from a cool Tennessee morning to a scorching afternoon makes the roof expand and contract, working every seam like a hinge. Add the flexing and twisting that happens as the rig rolls down uneven roads, and the sealant slowly loses its grip on the fittings it is supposed to protect.
Local conditions speed it up. Pollen and tree sap from the oaks and pines around many White House storage spots settle into the seams and hold moisture against the sealant. Standing water that ponds behind a rooftop A/C never fully dries. And the single biggest accelerator is simply skipping the yearly reseal — once a bead cracks, every rain drives a little more water underneath and lifts it further. Owners are often surprised that a roof that looked fine at purchase needs attention within a couple of seasons, but that is normal for an RV that sits outdoors year-round.
How to Inspect Your RV Roof Safely
If your roof is rated to walk on and you can get up there safely, a twice-a-year inspection is the best cheap insurance there is. Do it methodically:
- Use a stable ladder and only walk a roof the manufacturer rates for foot traffic; spread your weight near the stronger edges and over framing.
- Wash the roof first so you can actually see the sealant — grime hides cracks.
- Run a finger along every lap-sealant bead at the A/C, vents, skylight, fridge vent, antenna, and both caps, feeling for cracks, gaps, and lifted edges.
- Check the membrane for tears, bubbles, or soft areas, and note any spot that pooled water.
- Inside, open cabinets against the ceiling and sniff and feel for damp, musty framing.
Reseal only with a product matched to your roof type — self-leveling lap sealant for horizontal seams on EPDM or TPO, and the correct non-sag sealant on vertical edges. The wrong sealant will not bond and simply buys you a bigger leak.
RV Roof Leak Repair Options and What They Cost
Not every roof leak needs the same fix. Here is how the common options compare so you can decide what your situation calls for.
| Repair option | Best for | Typical cost |
|---|---|---|
| Emergency tape / temporary patch | Stopping an active leak on a trip until you can reseal | $20–$60 in materials |
| Reseal seams & penetrations (lap sealant) | Cracked, lifted sealant with a sound membrane | $150–$500 on site |
| Roof coating / full recoat | Aging membrane that is still intact but tired | $600–$2,000+ |
| Membrane section replacement | Torn or failed EPDM/TPO over good decking | $1,000–$4,000+ |
| Decking + membrane rebuild | Rotted, spongy roof from a long-term leak | $3,000–$8,000+ |
A mobile trip or diagnostic fee is usually quoted separately from the repair labor. The takeaway is simple: a $150–$500 reseal caught in time is a fraction of a multi-thousand-dollar decking rebuild after a leak sits for a season.
Protecting Your RV Roof Between Trips
Between camping seasons is when most Tennessee roof damage quietly happens, so a little prevention goes a long way. Keep the roof clean so sap and pollen do not sit in the seams, and rinse it a few times a year. If you can, park in the shade or under a cover to cut the UV load that ages the membrane, and be mindful of overhanging branches at your storage spot — a limb rubbing the roof in a storm can score the membrane in minutes.
Reseal on a schedule instead of waiting for a stain to appear, and treat any small crack you find as a same-week job rather than a someday job. After every strong storm or long highway haul up I-65, take five minutes to eyeball the cap seams and the A/C gasket. Owners who build these habits almost never face a rotted-decking rebuild; the ones who skip them usually find out the hard way after a wet spring.
Resealing a seam is within reach for a hands-on owner, but a roof that already shows interior stains needs a moisture check of the substrate before anyone reseals over it — otherwise you are just sealing water inside the wood. If your rig is stuck at a campsite with water coming in, our on-site campsite RV repair can tarp and stop the leak now and plan the permanent fix.
📞 (618) 387-2229
RV Roof Leak FAQ
Can I just put a tarp over my RV roof leak until I get it fixed?
A tarp or emergency tape is a fine short-term stopgap to keep more water out, but it is not a repair. The seam still needs to be cleaned and resealed, and if water already reached the decking, the wet area must be checked before you seal over it.
How often should I reseal my RV roof to prevent leaks?
Inspect the seals twice a year and after long highway trips, and plan on refreshing lap sealant at the penetrations roughly once a year. A full roof reseal is typically needed every few years depending on sun exposure and how the rig is stored.
Do you repair RV roof leaks on site around White House, TN?
Yes. Lindsey RV Repair is mobile and inspects and reseals RV roofs on site throughout White House, Portland, Springfield, Gallatin, Hendersonville, Goodlettsville, Millersville, Cross Plains, Ridgetop, and Greenbrier. Call (618) 387-2229.
For manufacturer guidance on matching self-leveling lap sealant to your roof membrane, Dicor is a helpful outside reference. When you would rather have the roof checked and sealed correctly, contact Lindsey RV Repair to book a mobile roof inspection.